Import a CAD Background
If you have not already done so, download the course files now.
- Start a New File with AGi32.
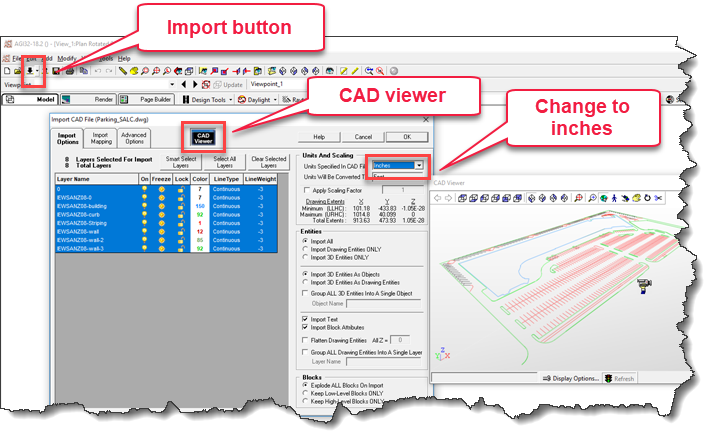
- Click on the Import button on the Main toolbar.
- From the folder AGi32 Site Lighting, select the file AGi32_Parking.dwg.
- Click on the CAD Viewer button to see the drawing.
- Change the Units Specified in CAD File to Inches.
- Click OK (twice) to proceed with the import.
AGi32 will automatically "Smart Select" layers that are On and not Frozen. Layers can be selected or unselected individually using Shift-select or Ctrl-select. The CAD Viewer displays the layers that are selected.

TIP: You can use the navigation buttons in the CAD Viewer to examine the drawing file from different angles. You can also click on the Display Options... button for additional choices in viewing the drawing. Check it out!
REALLY IMPORTANT GENERAL CAD IMPORT TIP: KISST!! (Keep It Simple, Save Time!) You might be tempted to often import an entire drawing as is. This might seem the quickest, most expedient thing to do. However, you will likely save much more time later by simplifying the file before you import. Larger files take longer to import, are slower to navigate about (zooming, panning, etc.), and take longer to export.
Therefore, don’t import more than you need for the lighting design and calculations. If you are designing tennis court lighting, don’t import the whole city park. Don’t import layers with irrelevant information, such as wiring diagrams and mechanical systems and finish schedules. Yes, that can be important information, but if you can refer to the original drawing for those details rather than importing them, you will be able to keep your .AGI file much simpler. If the file is three dimensional, a more complicated file will also take longer to calculate.

|
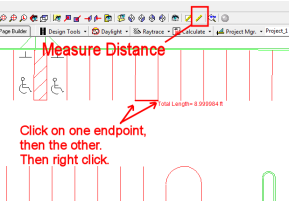
The first step after importing a CAD drawing is to check the scale.
|


